Hello people who accompany us here on our site. Today I bring you a simple pattern that you can train, I believe you have heard of C2C or already made that point is not, but did you know that you can work with other crochet stitches of C2C? It’s no secret that this crochet stitch is one of my favorites, so I loved that stitch that I brought to you today here in crochet step by step.
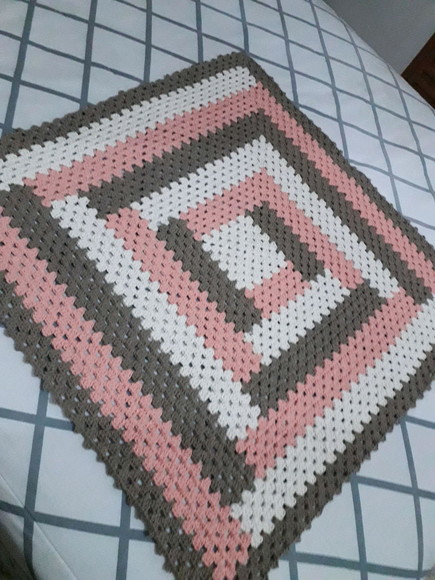
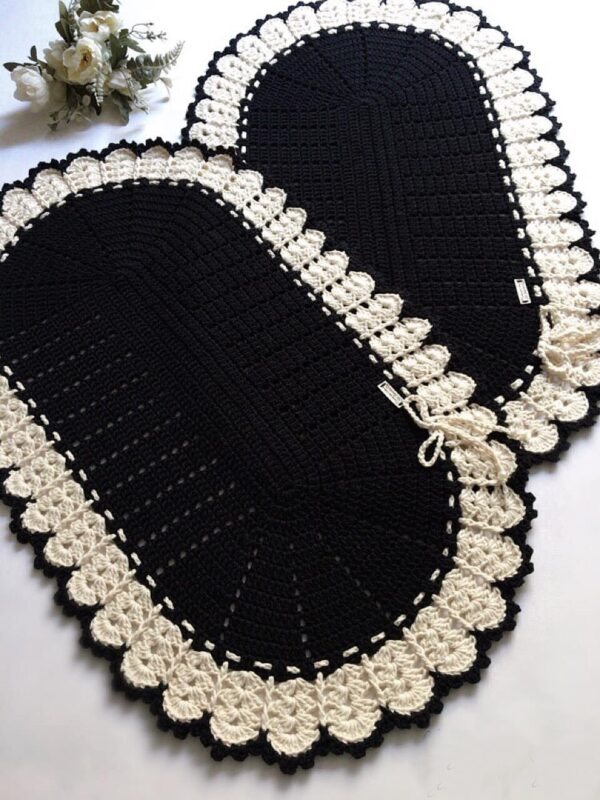
So when I learned that you can work the c2c moss point, I was outdated and improving my range of points I’ve learned. We can use them anywhere you want, there are no limits in this world of crafts. Below we have baby blanket models and soon after other models and colors.
I leave you images and step by step so that you can make this point without doubt in the name you click and have all the necessary instructions so let’s do your best, after all who works with the craft moves the mind, leaves you quieter and improve their skills.

Details
Pattern written in US crochet terms
Level of difficulty: easy
Finished Size: Any
Meter: Not important
Hook Size: Whatever is appropriate for your wire
Thread: Any
Pattern Notes
This creates a very elastic fabric. If you do something great like a baby blanket, you’ll probably want to block it in shape. The elasticity and bias construction can make your square look a bit smaller than the square. I promise it’s square! But with a lot of handling – like rotate and rotate the lines – you may miss some of the perfect angles.
Abbreviations
ch – current
hdc – half double crochet
sc – single crochet
sk – skip
slst – slip point
space sp
Score
Video tutorial
Start the pattern
INCREASE LINES:
Start by making increase lines.
Row I1: With the knot sliding on hook ch3, pull the third ch from the hook. Turn.
Line I2: Ch3, sk first sc, (sc, ch1, sc) at the next ch3 sp. Turn.
Line I3: Ch3, sk first sc, sc at the next ch1 sp, ch1, sk at the next sc, (sc, ch1, sc) at the next ch3 sp. Turn.
Line I4: Ch3, sk first sc, [sc at the next ch1 sp, ch1, sk at the next point] repeat until the next ch3 sp, (sc, ch1, sc) at ch3 sp. Turn.
Repeat line I4 until the short sides of the triangle reach the desired width.
Continue with the instructions in the rectangle if you want to make a rectangle, or if you want to make a square, jump to the instructions on the transition line.
TO MAKE A RECTANGLE:
After increasing the lines, repeat the lines R1 and R2 until the longer side reaches the desired length. (Ignore these if you are making a square.)
Line R1: Ch3, first point pb, pb next ch1 sp, [ch1, pg next pts, pb next ch1 sp] repeat from the side to the last sc, sk at the last sc, sc at the end ch2 sp. Turn.
R1 Tips: There is no ch1 sp between the last two sc of this line. The first time you make R1, the final ch2 sp will be the ch3 sp of line I4.
Line R2: Ch2, first, 2nd (next bp, 1 bp, 1 bp, 1 on next sts) repeat until the next 3p, (sc, ch1, sc) in ch3 sp. Turn.
Transition Line Rectangle: Ch2, sk at 1st point, sec. In the following, 1 pc, [pc1, fl at the next point, sec. No p. Next], repeat along the side to the last dc, c / db sec.
TO MAKE A SQUARE:
After increasing the rows, make the following transition line to create a square.
Transition Line Square: Ch2, rotate, hold first, [p on next ch1, ch1, m on next pd] until the next ch3 sp, (sc, hdc) on the next ch3 sp.
No border or border is provided for this pattern. The dot can be used as is, without adding a border, for a modern look, or add any border or border of your choice.
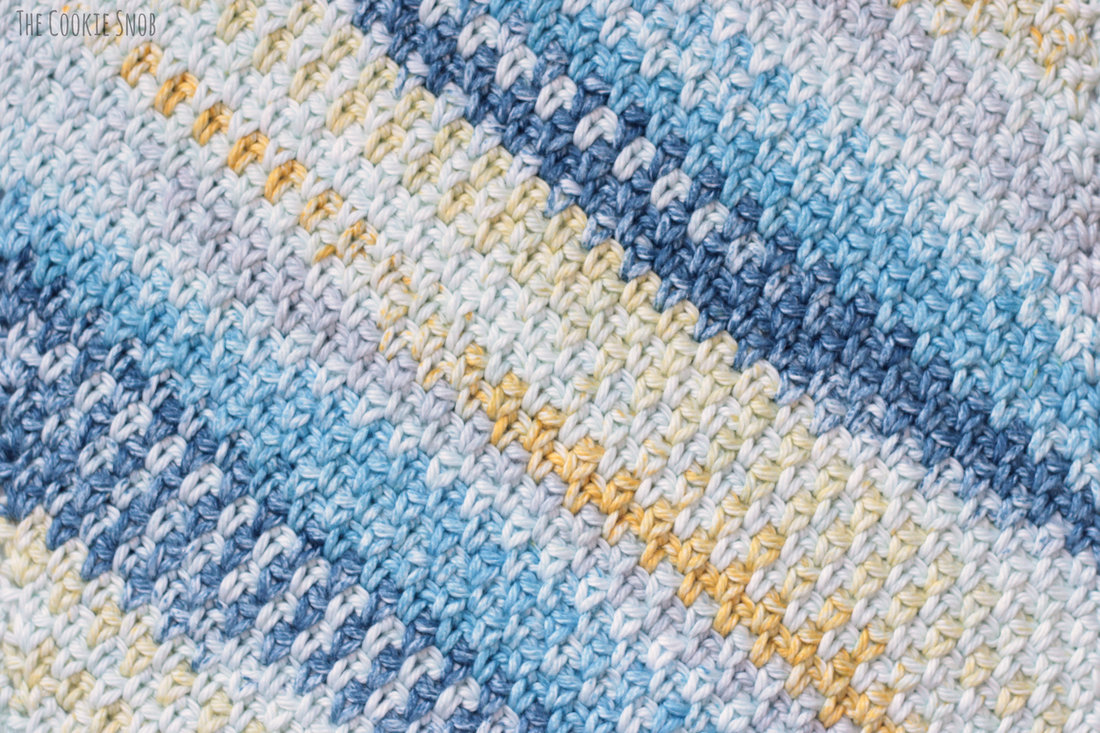
I leave you images and step by step so that you can make this point without doubt in the name you click and have all the necessary instructions so let’s do your best, after all who works with the craft moves the mind, leaves you quieter and improve their skills. The moss point c2c is perfect for a washcloth because it has a nice texture and is quite solid while still being elastic.
Now let’s go to the tutorial!
![]()